
My sister asked me how to do selective colouring, so I decided the best way would be to do a mini-tutorial with some pics to show how to do it :) Seeing as she will be using PSP, this tutorial is going to be for PSP..Hope its easy enough Sue!
SELECTIVE COLOURING
1) Choose the picture you want to recolour and open it in PSP
2) Make a copy of your image (Edit - Copy, and then Edit - Copy - Paste - As a new image)
3) Convert your copy into greyscale
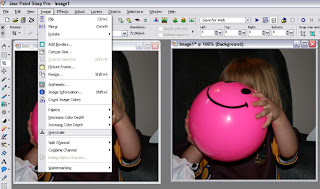
4) Now copy the greyscale image, click on the original picture, and paste the greyscale onto that one (Edit - Paste - As a New Layer). In the Layers box on the right, you should now see two layers (Background and Raster 1).
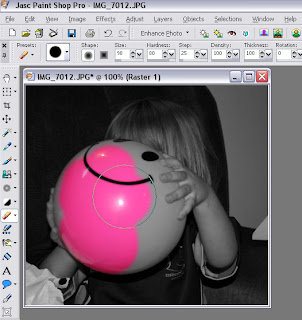
5) Select the eraser tool from the toolbar on the left hand column (it looks like a pencil with an eraser on the end). Adjust the size of the eraser as needed for the areas you are going to erase, and for the fiddly little areas, zoom right in for good definition. It should start to look something like this :-
6) Once you have the areas you want colour to show erased, you can then merge the two layers together like so :-
 7) Save your new image as a jpg, and you are done!
Here is the original image I started with...

And this was the final product.. very effective, and a great way to make parts of your picture pop!


1 comment:
Thanks lovely.
I've posted the photos on Facebook, let me know what you think.
Post a Comment